Doing a buff mani is the perfect way to give your hands a little love and your mind a relaxing break. A buff mani is special because it gives your nails a long-lasting shine, so you can be confident even without adding nail polish. Our founder, Amy Lin put together a buff mani tutorial to help you achieve a salon quality nail treatment and healthy nails at home. We use our hands for so many things in our lives. From cooking and working to holding hands with a loved one. A buff mani is a nice way to connect with yourself and give your hands the love they deserve. So if you want to achieve pretty, shiny and healthy nails follow Amy’s tutorial.
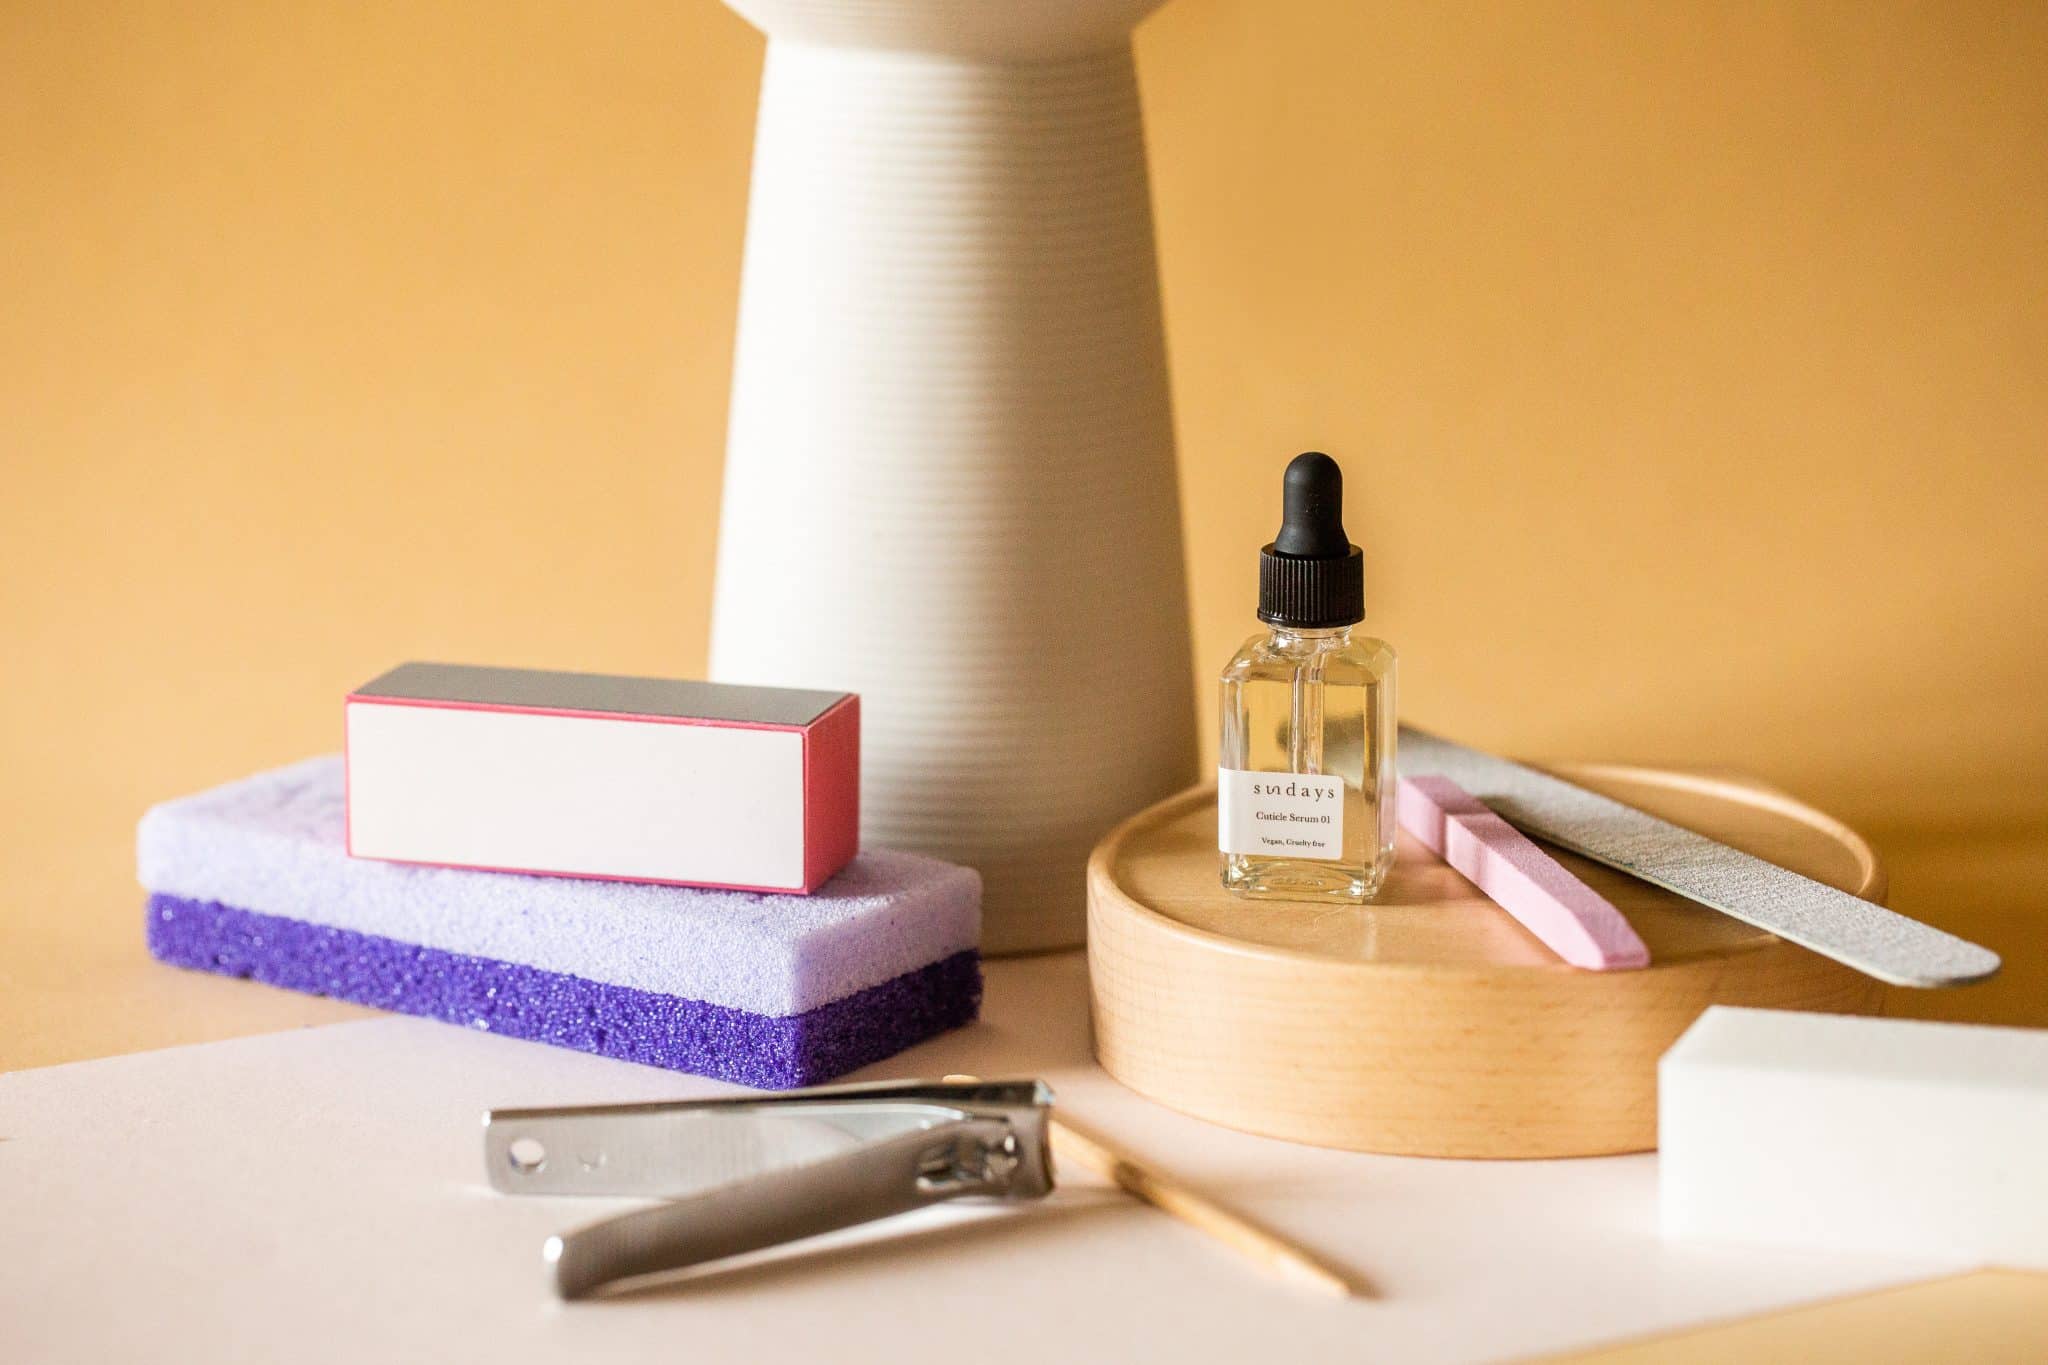
What you’ll need:
Polish remover, 3-way buff, nail file, cuticle serum, nail clipper, small buff cube, wooden stick, cuticle eraser, cotton pad/balls and a towel/paper towel.
- Remove your polish
Lightly soak a cotton ball/pad with nail polish remover, press on your nail for a few seconds, then move the soaked cotton down, making sure you’re not staining your skin.
- Cut your nails
Think about which shape you’d like to achieve when cutting your nails (round, square). If it’s round, start cutting the corners of your nails and if you’d like to achieve a square shape start by cutting the top middle of the nail.
- File Your Nails
File according to the shape you’d like to achieve. If you’d like to achieve a rounded shape, file from side to side and come back to the middle to file in the center. But if you want a square shape start filing from the middle. Filing is like playing a violin, moving the file from one side to the other. When we file our non-dominant hand, it might get a little difficult, so you can place your hand flat on the table and then file directly in front of your nails, moving the file back and forth.
- Buff Your Nails With the Small Buff Cube
Place the buffer underneath your nails and buff from side to side. Buffing is an important step because it can make the edge of your nails smoother. Another thing you can do if you have any lines on your nail bed is add cuticle serum on top of the nail and buff over it.
- Add Cuticle Oil
Amy’s suggests using sundays moisturizing CS.02 cuticle oil. Make sure you add one drop to each nail, without touching your skin with the dropper. Let the oil do the work and let it soak in your nail for 10-20 seconds.
- Push Back Your Cuticles
Use a wooden stick or cuticle eraser to push your cuticles. Use the flat side of the wooden stick and gently push your cuticles.
- Our favorite part! Do a little hand massage
Put a drop of hand lotion on your hand and gently massage it into your skin, especially between each finger. Try to press the pressure points as you massage, for example the one between your thumb and index finger.
- Clean your nails
Place a little bit of polish remover on a cotton pad and rub each nail, making sure there’s no excess oil left on the nail plate.
- Buff Your Nails
Use a 3-way shiny buff. The black side is the roughest side. First use the black side and buff the nail bed, moving the buff from side to side. It removes any ridges on your nail plate. Then use the white side of the buffer, buffing from side to side. Lastly use the grey side to get that shiny finish.
And you’re done! You’ve achieved beautiful, shiny nails. We recommend you reward yourself with a little cup of tea and a few minutes of meditation. We hope you enjoyed Amy’s tutorial and that you’ll always remember to give yourself and your hands a little love.
Want your nail polish to dry faster between coats? Check out our post on nail polish dry time.


