Gel and acrylic nail extensions are loved for their long-lasting shine, durability and flawless salon finish. However, once they’re removed, many people notice that their natural nails feel thin, weak, dry, or damaged. This is a common experience and not a permanent condition, but it does require the right aftercare.
Improper removal techniques, excessive buffing, prolonged wear, or frequent back-to-back applications can strip the nail plate of its natural oils and protective layers. Over time, this weakens the nail structure and slows healthy growth.
That’s why following a proper nail care routine after removing gel or acrylic extensions is essential. With the right steps, nourishing products and a little patience, you can restore nail strength, prevent breakage and support healthy regrowth.
This complete guide covers everything from immediate aftercare to long-term nail recovery, helping your natural nails bounce back stronger, smoother and healthier than ever.
Common Nail Problems After Gel or Acrylic Removal
Understanding what your nails go through after removal helps you treat them correctly instead of worsening the damage.
Most Common Issue:
- Peeling or splitting nails
- Thin and overly flexible nail plates
- Dry, brittle texture
- White spots or surface roughness
- Slow nail growth
- Sensitive or tender nail beds.
These problems are temporary, but ignoring them can prolong recovery. Consistent care is the key to reversing damage.
Step 1: Be Gentle Immediately After Removal
The first 24 to 48 hours after removing gel or acrylic extensions are crucial because your nails are at their weakest during this time. The nail plate may feel thin, soft and sensitive due to loss of natural oils and layers. Being gentle right away helps prevent further peeling, breakage and long-term damage. This recovery phase allows nails to rebalance moisture and begin repairing themselves naturally.
What to Do
- Avoid buffing or filing aggressively
- Keep nails short to prevent breakage
- Do not apply gel or acrylic again immediately
- Avoid harsh chemicals and detergents
What to Avoid
- Peeling leftover product
- Using metal tools harshly on nail plates
- Skipping moisturization
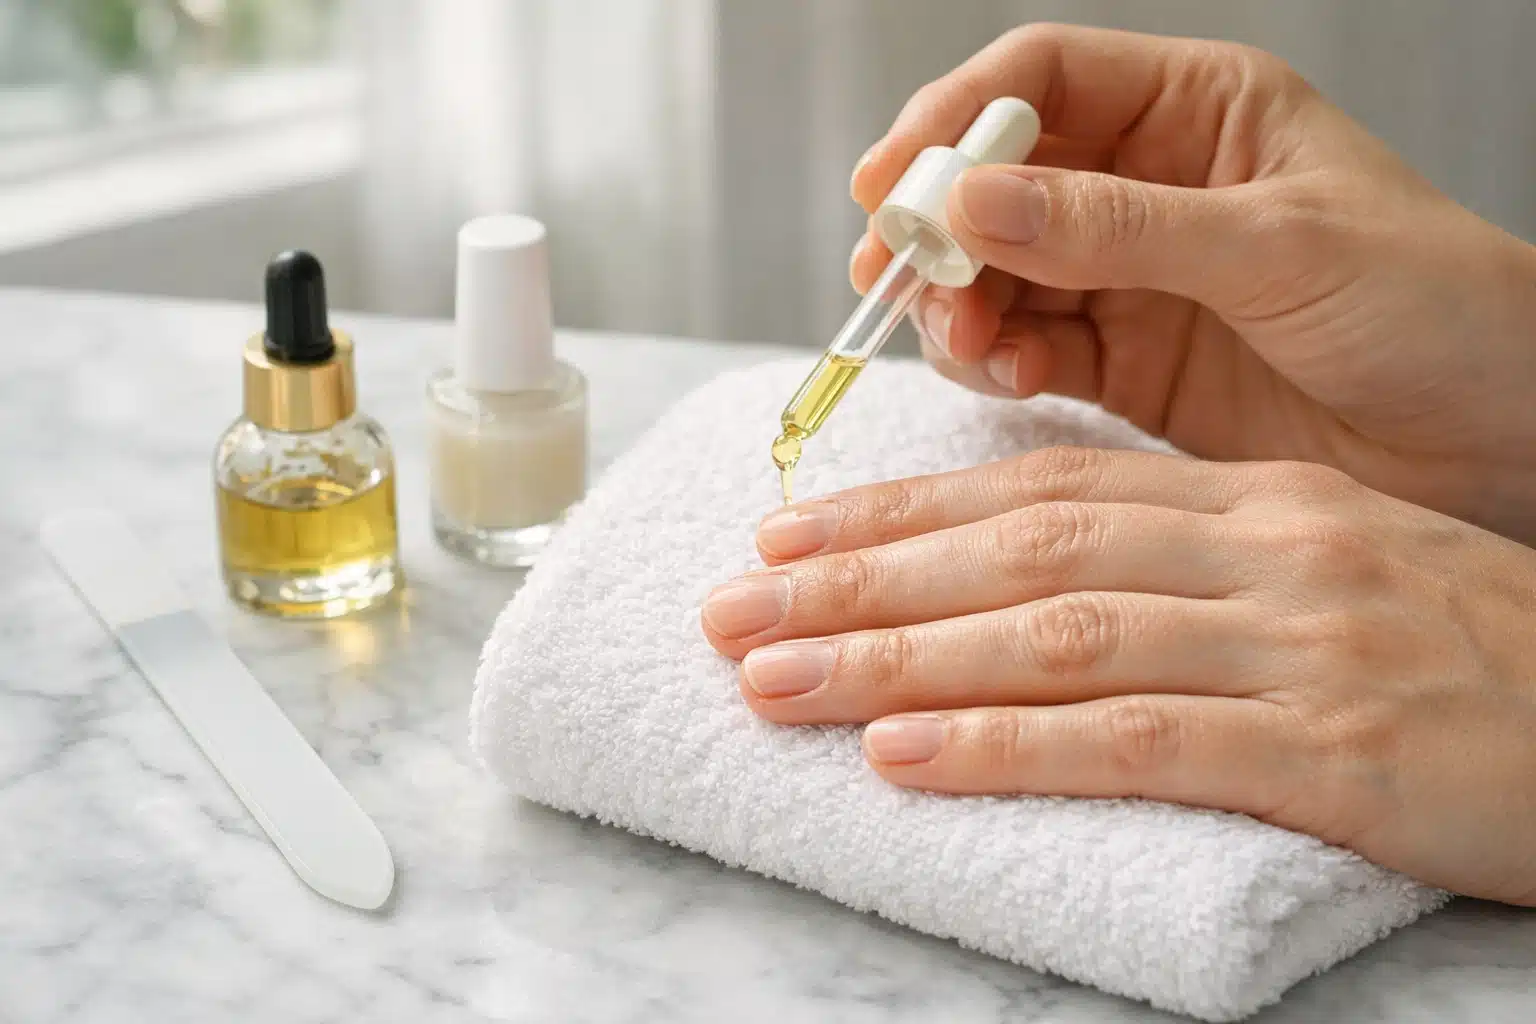
Step 2: Hydrate Nails and Cuticles Daily
Hydration is the foundation of nail recovery after gel or acrylic removal. Dehydrated nails are more prone to splitting, peeling and cracking, which slows the healing process. Consistent moisture helps restore flexibility and strengthens the nail structure over time. Daily hydration also improves the appearance of nails, making them look healthier and smoother.
Best Hydrating Products
- Cuticle oils (jojoba, almond, vitamin E)
- Nail serums
- Hand creams with glycerin or shea butter
How Often to Apply
- Cuticle oil: 2–3 times daily
- Hand cream: After every hand wash
Benefits
- Restores moisture
- Improves flexibility
- Prevents peeling and cracking
Step 3: Trim, Shape and File Correctly
Proper nail shaping plays a major role in preventing further damage during recovery. Weak nails are more likely to snag and split if left too long or shaped incorrectly. Filing gently and choosing the right nail shape reduces pressure on the nail edges. This step helps protect fragile nails while they regain strength.
Best Practices
- Keep nails short during recovery
- File in one direction only
- Use a glass or fine-grit file (180–240 grit)
- Avoid sharp square edges
Best Nail Shapes for Weak Nails
- Rounded
- Oval
- Squoval
Step 4: Strengthen Nails with Treatments
Once nails are properly hydrated, strengthening treatments help rebuild their structure and resilience. These treatments reinforce weakened layers and reduce breakage when used correctly. However, balance is important-overuse of hardening products can make nails brittle. Gentle, nourishing strengtheners work best during recovery.
Recommended Treatments
- Nail strengtheners (formaldehyde-free)
- Keratin or biotin nail treatments
- Calcium-infused base coats
How to Use
- Apply 2–3 times per week
- Remove gently with acetone-free remover
Pro Tip
- Avoid overly hardening products, as they can make nails brittle if overused
Step 5: Take a Break from Gel and Acrylics
Giving your nails a break from extensions is essential for full recovery. Continuous use of gel or acrylics prevents damaged nail layers from rebuilding properly. A rest period allows nails to grow out stronger and healthier. Even a short break can significantly improve nail condition.
Ideal Recovery Time
- Minimum: 2–3 weeks
- Ideal: 4–6 weeks
During the Break
- Use regular or non-toxic nail polish
- Apply strengthening base coats
- Focus on nail care over nail art
Step 6: Follow a Nail-Healthy Diet
Nail health starts from within and nutrition plays a key role in nail recovery. Weak or slow-growing nails can often be linked to nutrient deficiencies. A balanced diet supports keratin production and improves nail strength, flexibility and growth. Consistent intake of nail-friendly nutrients speeds up visible recovery.
Nutrients for Nail Growth
- Biotin – strengthens nails
- Protein – builds keratin
- Iron – prevents brittleness
- Zinc – supports nail repair
- Omega-3 fatty acids – improve moisture
Nail-Friendly Foods
- Eggs
- Nuts and seeds
- Leafy greens
- Salmon
- Lentils
Step 7: Use Gloves for Protection
Everyday household tasks can slow nail healing if nails are left unprotected. Prolonged exposure to water and chemicals weakens the nail plate and removes moisture. Wearing gloves creates a barrier that protects recovering nails from unnecessary stress. This simple habit makes a noticeable difference over time.
When to Wear Gloves
- Washing dishes
- Cleaning
- Gardening
- Handling chemicals
Why It Helps
- Prevents water damage
- Reduces chemical exposure
- Retains nail moisture
Step 8: Choose Non-Toxic Nail Products
Switching to non-toxic nail products helps prevent further damage and supports nail recovery. Harsh chemicals can worsen dryness, peeling and sensitivity. Clean formulations are gentler on weakened nails and safer for long-term use. This step is especially important during the healing phase.
Look for Labels Like
- 7-free, 10-free, or 15-free
- Vegan and cruelty-free
- Low-odor formulas
Ingredients to Avoid
- Formaldehyde
- Toluene
- DBP
- Camphor
Step 9: Gentle Nail Polish Application (If Needed)
If you prefer wearing nail polish during recovery, application technique matters. Applying polish incorrectly can cause staining, dryness and additional damage. Gentle application and regular removal allow nails to breathe while still looking polished. Choosing lighter shades also reduces stress on the nail plate.
Best Practices
- Always use a base coat
- Apply thin layers
- Avoid dark shades initially
- Remove polish every 5–7 days
Step 10: Maintain a Weekly Nail Care Routine
Consistency is the key to long-term nail recovery. A simple weekly routine keeps nails nourished, protected and strong. Regular care prevents setbacks and supports steady nail growth. Over time, this routine helps restore nails to their natural, healthy state.
Weekly Nail Care Checklist
- Trim and file nails
- Push cuticles gently (no cutting)
- Apply nail mask or oil soak
- Use strengthening treatment
Mistakes to Avoid After Gel or Acrylic Removal
After removing gel or acrylic nail extensions, your nails enter a fragile recovery phase. Many people unintentionally slow down healing by repeating habits that caused damage in the first place. Avoiding these common mistakes is just as important as following the right nail care steps. Being mindful during this period helps prevent further thinning, peeling and breakage while allowing nails to rebuild strength naturally.
Reapplying Extensions Too Soon
One of the biggest mistakes is reapplying gel or acrylic nails before the natural nail has had time to recover. Nails need a break to restore lost layers and moisture. Applying extensions too quickly traps weakness underneath, leading to more severe damage over time. Always allow at least a few weeks for visible improvement before considering enhancements again.
Skipping Cuticle Care
Cuticles protect new nail growth and neglecting them can significantly slow recovery. Dry, damaged cuticles can lead to hangnails, infections and uneven nail growth. Regularly applying cuticle oil keeps this area nourished and supports healthier, stronger nails from the base.
Over-Buffing Nails
While it may be tempting to buff nails to make them look smooth, excessive or aggressive buffing removes essential nail layers. Over-buffing weakens the nail plate, making nails thinner and more prone to splitting. If buffing is necessary, keep it light and infrequent, focusing only on surface smoothing.
Using Harsh Removers
Acetone-heavy or chemical-laden removers strip nails of moisture and worsen dryness after extension removal. This can cause peeling, brittleness and sensitivity. Choosing acetone-free or gentle removers helps maintain hydration and prevents additional damage during recovery.
Ignoring Nutrition
External care alone isn’t enough if your body lacks the nutrients needed for nail repair. Poor diet choices or nutrient deficiencies can slow nail growth and weaken regrowth. Ignoring nutrition often leads to prolonged recovery, even with the best nail products. Balanced nutrition plays a crucial role in restoring nail health from the inside out.
Conclusion
Removing gel or acrylic nail extensions does not mean your nails are permanently damaged – it simply means they need intentional care, patience and time to heal. Nail recovery is a gradual process that depends on gentle handling, proper hydration, smart product choices and consistent routines.
By following this complete nail care guide, you can repair visible damage, restore lost moisture and rebuild nail strength naturally. Small daily habits, like using cuticle oil, avoiding harsh chemicals and protecting nails during everyday tasks, add up to long-term results.
Healthy nails are not achieved overnight. They are the result of consistency, mindful aftercare and listening to what your nails need. Give your nails the break and nourishment they deserve and they will reward you with improved strength, smoother texture and healthier growth over time.
With the right approach, strong and beautiful natural nails are not just possible – they are absolutely achievable.


